
The options are endless when it comes to taping and decorating hand-made hoops. Taping your first hoops can be a little intimidating, but I’ve had plenty of experience and will share with you what I’ve learned on how to tape hoops.
The most commonly used tapes are:
- Vinyl – Basically electrical tape, available in many different widths
- Gaffer (or Grip) – Cloth tape that helps your hoop stick to you better while hooping
- Metallic (or Deco) – Super sparkly reflective and mirror tapes in different patterns
TIP: When first learning how to hoop dance or when working on new tricks, stick to hoops decorated with vinyl and gaffer tapes. You are bound to throw your hoop a lot and these tapes are the most durable.
Where should you buy hoop tape? I’ve always used identi-tape.com and Nikki has ordered from hoopsupplies.com. Both places are good. Sometimes you can find standard electrical tape in 6-8 color varieties at hardware stores too (if you just can’t wait for shipping and needs a hoop now)!
TIP: When ordering tape online buy a bunch at once to save on shipping costs. One of everything please!
What are the best widths of tape to buy? That varies a little based on the kind of tubing that your hoops are made from. If your hoop is thicker black polyethylene tubing you can get away with wider tapes up to 2″ vinyl and 1″ metallic. If your hoop is skinnier and made from white, clear or colored polypropylene tubing I recommend sticking to 1″ or less vinyl and 3/4″ or less metallic. As for 1/8″, 1/4″ and 1/2″ wide tapes you can use them on any kind of hoop as your last layers to add color.
TIP: When creating a solid 1-color metallic hoop, use 3/4″ wide tape verses 1″. It will lay down much more smoothly and you can tweak it a teeny bit, whereas the 1″ metallic tape will crinkle and bubble if you stretch it.
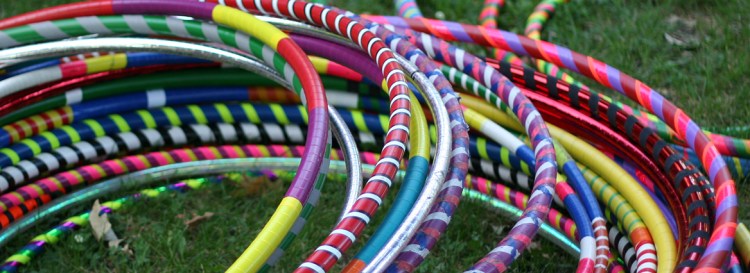
The design of your hoop is up to you! Be creative. Decide on your tape colors and pattern before you start. Swirl patterns are obviously the most popular, but there are many different options.
TIP: If you are dividing your design into sections, do the math first so they come out even. Use small pieces of tape to mark off the segments before starting. Circumference = 3.14 x Diameter
Layering the tapes properly makes a big difference. I find it best to start with vinyl tape. Use your metallic tape next (if you have any). Then add skinnier vinyl colors (which are also good for sealing down edges of metallic tapes). End with your gaffer.
TIP: If you start with a full solid layer of vinyl tape as your base you will have a much easier time removing the tape in case you ever decide to re-tape your hoop in the future. If you’ll never re-tape it, then it’s okay to begin with metallic tape.
Laying down the tape is an art that just takes practice. Break out your tape and just start wrapping! Just like hooping, the more you do it, the better you get. The key is to perfect your spacing right from the start. If the swirl is too wide or too tight, just undo it and keep restarting until it aligns how you want it to. Keep your tape taut and prevent bubbles before they start, using your fingers to smooth the tape down.
TIP: You may want to save your favorite tape combinataion until after you get a feel for taping hoops. You’re bound to give away a lot of hoops if this is your first time making them. Use your first creations as give-away hoops and create your own master work once you are well acquainted with the tape.
Retaping your hoops is possible. I run a razor all the way around my hoop then peel it off in big chunks. (If you have beat up metallic tape with no vinyl tape layer below it this may not be worth your effort.) Then clean off the stickiness off and start fresh. I used a paper towel and some olive oil followed by some general purpose cleaner then water to remove any left over detergent.
…And that’s all I got for you. Go forth and tape!
If you have any more hula hoop taping tips or advice to share, please add leave them in the comments. Questions are welcome too!

One thought on “Hoop Taping Tips”